DIY Hardware Hacks
WARNING: Dangerous!
We recomend that you use Home Buttons as is. Do not do any of the modifications, unless you have experience soldering and working with electronics and know exactly what you are doing. Modifying battery powered devices is dangerous and can result in equipment damage, injury and fire.
USB power without battery
Home Buttons hardware revision 2.1 (visible on the PCB under the Home Buttons text) is designed to only be powered by a battery cell. Later revisions also support USB-C or 5V DC input. To enable USB-C power on this revision, you can perform this modification.
After doing this modification, battery use will no longer be possible!
- Unmount Home Buttons from the wall and remove the battery.
- Remove the PCB from the case by flexing the top wall of the case outwards and lightly pressing on the top part of the display, so that the PCB pops out at the top.
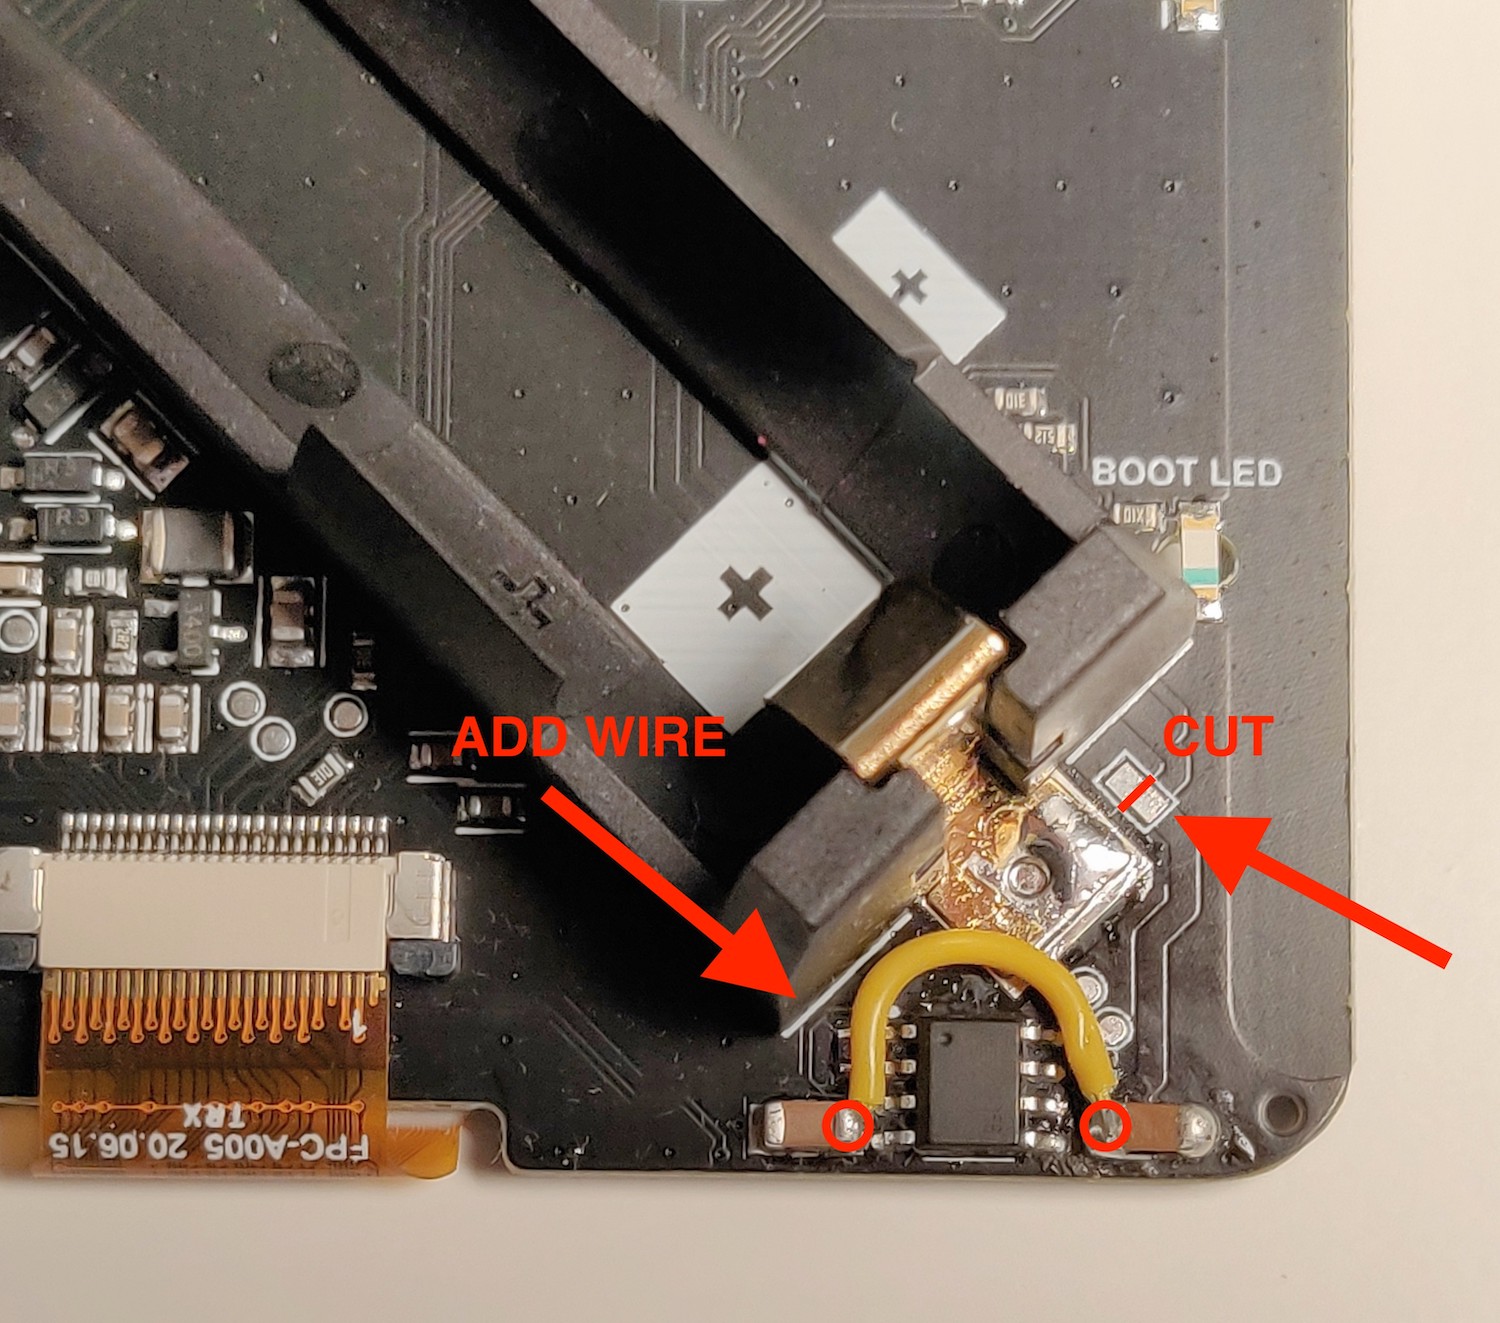
- Place the PCB display side down and take a look at the bottom right corner. This is the area we are going to modify.
- First, cut the trace connecting a solder jumper marked below. Confirm with a multimeter that there is no connection between the two jumper pads. This disconnects the battery holder from the circuit, so even if the battery is accidentally inserted, nothing bad happens. If desired, you can also de-solder the battery holder completely instead of cutting the jumper.
- Next, solder a short piece of wire between the inner contact of the two capacitors, as marked below. Use a wire that is very thin and flexible.
- Connect your USB power supply and test if device works correctly.
- Place the PCB back into the case by first inserting the bottom part at an angle and then pushing the top part in until it snaps in place.
- The device are now ready to be used without battery.
If you wish to revert this hack, remove the added wire and bridge the jumper with a solder blob.